yum install kernel-headers make gcc
yum update kernel*
reboot
Saturday, June 22, 2013
How to install Guest Additions on CentOS 6.4
Posted by Fitri at 1:40 AM 0 comments
Labels: CentOS
Saturday, June 1, 2013
How to install XBMC on Fuduntu 2013.1
 Its a bit out from my main topic on this blog. I extend my tutorial category or topics on this blog. Now I will write tutorial for ClearOS, CentOS, Oracle and other RPM based Linux including Fuduntu. OK this is my first Fuduntu tutorial and I want to show you how easy to install XBMC on Fuduntu 2013.1.
XBMC is my favorite multimedia player for Linux and Windows. The modern interface has attracted me to try it several months ago and now I fall in love with it. Every Linux distribution that I install, I always test if XBMC runs on that distros.
XBMC is available in Fuduntu/CentOS repository so we can easily install it with a single command
yum install xbmc
Once finished, we can start using it and play your favorite movies and music on Fuduntu using XBMC.
Posted by Fitri at 7:38 PM 0 comments
Labels: Fuduntu
Thursday, May 30, 2013
How to perform automatic backup on ClearOS 6.4 using Rsync
Rsync is a powerful tool to perform backup from one computer/server to another. on this tutorial I am going to show you how to use rsync to perform automatic backup on ClearOS 6.4 server. The idea here is to backup a directory from ClearOS 6.4 server to another location or another server.
Requirements:
- rsync package installed on ClearOS server
- Another computer to store the backup. I am using a Samba shared folder on another computer on the same LAN.
First we need to make sure if rsync is installed on ClearOS 6.4. Type this command to check
rsync --version
It should returned similar to this
rsync version 3.0.6 protocol version 30
Copyright (C) 1996-2009 by Andrew Tridgell, Wayne Davison, and others.
Web site: http://rsync.samba.org/
Capabilities:
64-bit files, 64-bit inums, 32-bit timestamps, 64-bit long ints,
socketpairs, hardlinks, symlinks, IPv6, batchfiles, inplace,
append, ACLs, xattrs, iconv, symtimesrsync comes with ABSOLUTELY NO WARRANTY. This is free software, and you
are welcome to redistribute it under certain conditions. See the GNU
General Public Licence for details.
If not, you may need to install rsync
yum install rsync
On this example I want to backup the directory inside /var/flexshare/shares into "backup" shared directory on other computer with IP address 192.168.1.10.
To backup using rsync, simply execute this command
rsync -avv /var/flexshare/shares/mapping_database -e ssh admin@192.168.1.10:/backup
If you want to delete the files and directory on the remote computer that do not exist on the source, you can add --delete options into the command
rsync --delete -avv /var/flexshare/shares/mapping_database -e ssh admin@192.168.1.10:/backup
To automate this job, you can create a new cron job. I do this via webmin. Please read how to install webmin on ClearOS 6.4 just in case you need it.
Posted by Fitri at 11:30 PM 0 comments
Labels: How to
Tuesday, May 28, 2013
Error in PREUN scriptlet in rpm package plexmediaserver
I just tried to uninstall plexmediaserver package from my ClearOS Server but I got the following error everytime I execute the remove command
Error in PREUN scriptlet in rpm package plexmediaserver
I've done something mess by deleting a directory required by plexmediaserver to run. And I was forgot that at that time, plexmediaserver is running. Then this error is coming....whufftt...what a day.
Posted by Fitri at 4:14 AM 0 comments
Labels: General
Add NTFS support to ClearOS 6.4
 In order to read or mount an NTFS disk drive under ClearOS, we need to install additional package which is not installed by default on ClearOS. The package needed to read NTFS disk on ClearOS is fuse-ntfs-3g.
The NTFS-3G driver is a safe read/write NTFS driver for Linux, Mac OS X, OpenSolaris, FreeBSD, NetBSD, QNX, Windows and Haiku, providing fast and POSIX handling of the Windows XP, Windows Server 2003, Windows 2000, Windows Vista and Windows 7 file system
Posted by Fitri at 4:11 AM 0 comments
Labels: How to
Wednesday, May 22, 2013
ClearOS 6.4 web configuration part 2
Please read the previous tutorial on ClearOS 6.4 web configuration part 1 as the first thing to do after finish installing ClearOS 6.4 server.
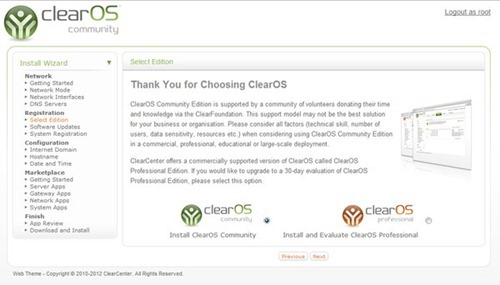
OK now its the time to select which ClearOS you want to use. Community or Professional? Which one you need to select? On this example, I install ClearOS Community edition.
Posted by Fitri at 11:23 PM 0 comments
Labels: How to
How to build a NFS Server on ClearOS 6.4
NFS Server is another file sharing protocols other than CIFS (Samba). There are many advantages by using NFS. Many other applications or system that needs an NFS shares to work on. For example Proxmox Backup storage supports the NFS shared directory as well. OK here I want show you how to install and configure NFS Server on ClearOS 6.4
Install NFS Server on ClearOS
yum install nfs-utils rpcbind
Start the nfs server daemon
service nfs start
Posted by Fitri at 8:38 PM 0 comments
Labels: How to
How to install Glusterfs on ClearOS 6.4
Glusterfs is a powerful NFS server for Linux. This quick tutorial will show you how to install Glusterfs on ClearOS 6.4. To find more about Glusterfs, please visit http://www.gluster.org. If you want to power up your ClearOS with NFS server capability, Glusterfs could be better solution.
Install Glusterfs on ClearOS 6.4:
Login to the server using Putty or ssh and cd to /etc/yum.repos.d/
cd /etc/yum.repos.d
wget http://download.gluster.org/pub/gluster/glusterfs/3.3/3.3.1/CentOS/glusterfs-epel.repo
yum install glusterfs
OK, I am currently preparing a quick tutorial how to configure and how to use glusterfs on ClearOS server.
Posted by Fitri at 6:58 PM 0 comments
Labels: How to
Configure the ClearOS serve for the very first use - part 1
On my previous tutorial how to install ClearOS 6.4 part 1 and part 2 I already show how to install ClearOS 6.4 on a server from the very beginning. After the ClearOS was installed, we need to configure the server via web management console.
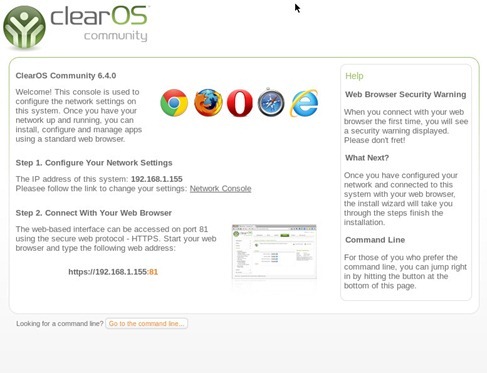
After reboot, open Google Chrome or other web browser from client computer on the same LAN with the server. Type https://192.168.1.155:81 where 192.168.1.155 is the ClearOS server IP address. You can check the IP address of the Server and how to access it from your server. You will see this on your Server screen. We can change the IP address via this console as well.
Posted by Fitri at 6:35 PM 0 comments
Labels: How to
How to install ClearOS 6.4 - Part 2
Please read our previous tutorial on how to install ClearOS 6.4 Part 1 before reading this part 2. OK let's continue.
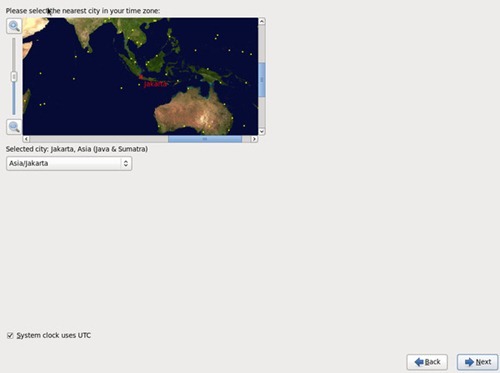
Now its time to select the time zone. Click on the map where you live.
Posted by Fitri at 6:18 PM 0 comments
Labels: How to
How to install ClearOS 6.4 Tutorial with screenshots-Part 1
ClearOS is a perfect Linux server for personal or even for Enterprise scale industry. Its powerful, easy to use and free (community edition). Here I am going to show a walkthrough the installation of ClearOS 6.4 with screenshots on some important sections. Because the whole tutorial is quite long, I split this tutorial into several parts.
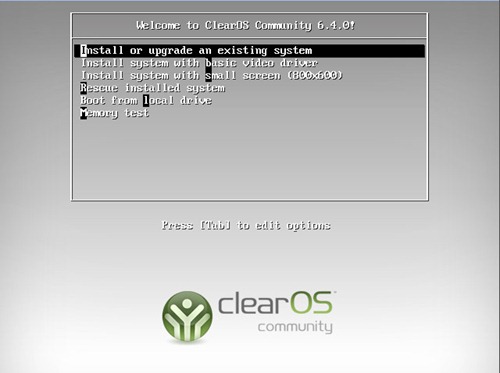
Boot the server using ClearOS ISO and on the first screen select Install or Upgrade an existing system.
Posted by Fitri at 6:08 PM 0 comments
Labels: How to
Tuesday, May 21, 2013
How to add new user on ClearOS 6.4
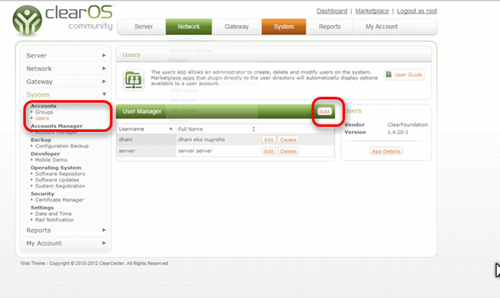
In order to add new user on ClearOS server, we can use the web config manager to do this. Simply open your web browser and type https://192.168.1.2:81 . Change the ip address with your ClearOS server IP address. Next, go to System section and click User to open the User management section.
Press Add and enter the new user details
Posted by Fitri at 9:48 PM 0 comments
Labels: How to
How to mount NFS Share on ClearOS 6.4
I have several servers on my office which running both Linux and Windows. Sometimes, I need to mount remote shared folder into another server. Here I am going to show you how I mount a NFS shared folder into ClearOS server. So, the ClearOS 6.4 is acting as an NFS Client. OK lets do it.
Login to ClearOS server using ssh or Putty. Now install the following package in order to connect to remote NFS server.
yum install nfs-utils
Posted by Fitri at 5:54 AM 0 comments
Labels: General
ClearOS 6.4 Community Edition - The most advanced Linux Server today
Personally I want to say many many thanks to the ClearOS developers. They have done an amazing work, ClearOS 6.4. So far, ClearOS is the most advanced, easy to use and rich features Linux server. I do love the web interface which is simple, easy and nice looking.
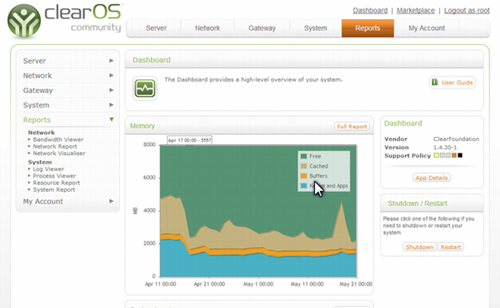
From this web console, you can do almost anything to the server. It gives you any information about your server status, user activity, server load, software updates and many more.
I use ClearOS 6.4 Linux for the following:
- File Server
- Primary Domain Controller
- Gateway Server
- Proxy
- Multimedia Server
Posted by Fitri at 2:48 AM 0 comments
Labels: General
Monday, May 20, 2013
Which ClearOS are you using ?
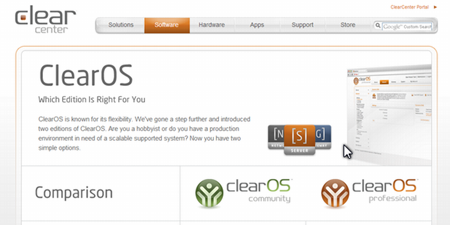
ClearOS is available in two version. ClearOS free version/community edition and ClearOS Professional which is a paid service. If you are running ClearOS on a profit company or Enterprise, you should choose the professional one. The more features and supports are available in Professional edition. But if you use it for your own use, home or non profit organization, the community edition is enough.
To find more about the differences and comparison between ClearOS community and Professional edition, you may take a look at ClearOS website.
Posted by Fitri at 10:11 PM 0 comments
Labels: General
Welcome to my Blog
Hi, my name is Fitri. I am a big fan of ClearOS. I manage several ClearOS servers on my office. On this blog I want to write my experience while using ClearOS server. Its not an official tutorial of ClearOS but I just a fan of it. It's a learning blog, so everything written here is for educational purposes only. If you found it useful, please use it for free. You can also send me personal message and discuss about any ClearOS stuffs. I will answer any question if I could.
Thank you and welcome to clearos-tutorial.blogspot.com
Posted by Fitri at 9:16 PM 0 comments
Blog Archive
-
▼
2013
(16)
-
►
May
(14)
- How to perform automatic backup on ClearOS 6.4 usi...
- Error in PREUN scriptlet in rpm package plexmedias...
- Add NTFS support to ClearOS 6.4
- ClearOS 6.4 web configuration part 2
- How to build a NFS Server on ClearOS 6.4
- How to install Glusterfs on ClearOS 6.4
- Configure the ClearOS serve for the very first use...
- How to install ClearOS 6.4 - Part 2
- How to install ClearOS 6.4 Tutorial with screensho...
- How to add new user on ClearOS 6.4
- How to mount NFS Share on ClearOS 6.4
- ClearOS 6.4 Community Edition - The most advanced ...
- Which ClearOS are you using ?
- Welcome to my Blog
-
►
May
(14)
Based on original Visionary template by Justin Tadlock
Visionary Reloaded theme by Blogger Templates
This template is brought to you by Blogger templates
